Binary Installation Instructions v2.99.47 (2023/03/10)
Yes, the version number is a bit odd, but this IS a release version
Choices
There are three ways to install EMAN2:
- Traditional Binary Installation (includes Anaconda/Miniconda install)
If you are already an active Anaconda user, you may prefer approach 2 or 3, above, since it will install within your existing Anaconda system (in its own environment). Having 2 separate Anaconda installs in the same account can be a problem. We like to encourage people to use approach 3 when possible, because A) It can also use an existing Anaconda install, B)it will optimize the binary for the specific CPU you have and C) updating to our current development version becomes a very simple/quick process (if you run into a problem it becomes trivial to check if we have already fixed it). It does require that you have a C compiler installed on your machine, but otherwise requires little other knowledge. If you have built other scientific software from source in the past, we strongly encourage you to try method 3. Method 1 is the same method we have used to distribute EMAN2 binaries for the last several years. It includes a copy of Miniconda (a small version of Anaconda), with EMAN2 installed into an environment. Again, method 1 is NOT recommended if you already have Anaconda on your machine.
Option 2: Install into an existing Anaconda setup (all platforms, experimental)
This method is still experimental. To use this approach, you must already have Miniconda or Anaconda installed.
- On M1/M2 Macs, make sure you have the ARM64 Anaconda/Miniconda, not Intel.
On Windows 11 machines, you may not use a native Windows Anaconda install, but rather need a Linux Anaconda install within a WSL2 environment!
Update (optional): You may wish to consider updating Anaconda before installing:
conda update --all
but consider possible impact on other Anaconda environments you may have configured.Install mamba (optional): We had been recommending that everyone install 'mamba', a MUCH faster alternative to the 'conda' command. However, mamba no longer seems to be installing properly itself with the current (as of Mar 2023) release of Anaconda. So, if you are using a somewhat older Anaconda installation, you may want to consider installing mamba, then using 'mamba' instead of 'conda' when installing packages. If you try to install mamba and it gets stuck for a long time or fails, then just use 'conda' for the EMAN2 install. Conda may take a long time to solve the install. If you want to try installing mamba:
conda install mamba -c conda-forge
Install: We strongly recommend installing EMAN2 within its own Anaconda/Miniconda environement:
conda create -n eman2 eman-dev==2.99.47 -c cryoem -c conda-forge
M1/M2 Macs (Optional): initial support for Tensorflow on the GPU is available via PyPi, but not conda.
# with the eman2 environment activated
pip install tensorflow-metal
Linux: see the GPU section below.
Activate to Use: Any time you want to use EMAN2 you will need to first activate the correct environment. You can deactivate when done.
conda activate eman2
- Run these programs to see if the install worked:
   1 # This will display the exact version you have installed. If you ask for help, provide the full output of this command.
   2 e2version.py
   3 # Relative speed factor of a single core on your computer, 2-3 typ.
   4 e2speedtest.py
   5 # Opens a browser window you can use to view any EMAN2 compatible file in various ways
   6 e2display.py
   7 # Creates a small image with a circle in the middle of it
   8 e2proc2d.py :64:64:1 test.hdf --process mask.sharp:outer_radius=24
   9 # Displays the file you just created
  10 e2display.py test.hdf
Option 1 (Linux): Standard Binary Install
The neural network code in EMAN2 works best on machines with Nvidia GPUs. For this to work, compatible Nvidia drivers, CUDA libraries and Tensorflow GPU support must be installed.
Cleanup: Only if you have an old pre-Anaconda install of EMAN2 on your machine:
- Please remove or rename any existing installed EMAN2 folder you might have.
- Please remove any existing EMAN2 entries from PATH.
- LD_LIBRARY_PATH, DYLD_LIBRARY_PATH, PYTHONPATH and PYTHONHOME are NO LONGER USED, and should be removed if you have them set.
- If you have any of these shell variables set for use with other software, it may be necessary to remove those settings as well. If the tests below fail after installation, this is the first thing to check.
Download: Download EMAN2.99.47
Install:
1 bash <path-to-EMAN2-installer>- You will be prompted for a location to install EMAN2. Note that you cannot rename this folder after installation! You must reinstall if you wish to move the installation.
- You will be asked if you want to initialize EMAN2 (conda init). Answer yes, or you won't have access to the 'conda' command in your shell.
EMAN2 initialization will add a block of code to your .profile/.bashrc/.zshrc file. You may check this file after installation to make sure an Anaconda block exists.
Close Shell After installation, close your current terminal window/tab, and open a new one. The new terminal should have access to the 'conda' command. Depending on your Anaconda settings, you may need to run conda activate before using EMAN2 commands and conda deactivate to return to your normal shell settings.
Test: Run these programs to see if the install worked:
   1 # This will display the exact version you have installed. If you ask for help, provide the full output of this command.
   2 e2version.py
   3 # Relative speed factor of a single core on your computer, 2-3 typ.
   4 e2speedtest.py
   5 # Opens a browser window you can use to view any EMAN2 compatible file in various ways
   6 e2display.py
   7 # Creates a small image with a circle in the middle of it
   8 e2proc2d.py :64:64:1 test.hdf --process mask.sharp:outer_radius=24
   9 # Displays the file you just created
  10 e2display.py test.hdf
Troubleshooting and Tips
If you have an NVidia graphics card, see ''Using the GPU'' section below.
If you receive an "Illegal Instruction" crash, this usually means your CPU isn't compatible with the binaries. You can try a snapshot version instead of the release and see if that helps, but if still having issues, we suggest you build from source. It's a lot easier than it sounds, and will produce binaries optimized for your specific computer.
If you get an error like the one below, dependency installation step might have failed.
Traceback (most recent call last):
  File "/.../.../eman2/bin/e2proc3d.py", line 35, in <module>
    from past.utils import old_div
ModuleNotFoundError: No module named 'past'
In this case try running the dependency installation manually.
conda install eman-deps=33.1 -c cryoem -c conda-forge -c defaults
- If you have problems with any of the test programs, the first thing to check is whether you have PYTHONPATH, PYTHONHOME, LD_LIBRARY_PATH or DYLD_LIBRARY_PATH set in your shell. While used in previous versions of EMAN, and sometimes required by other software still, they may interfere with Anaconda. If they are set to make some other software package work, but they interfere with EMAN2, you will have to unset them, and set them again only when you need the other software.
If only the GUI fails and you are using an Nvidia graphics card, it is likely caused by a graphics card driver incompatibility. Updating the Nvidia driver usually fixes the problem. On recent Ubuntu systems, running apt-get install nvidia-current works. On other systems, you may need to follow the installation guide from Nvidia.
- You will find that when you open a new shell, you will see (base) added to your command prompt. This indicates that Anaconda, the environment EMAN2 now uses for distribution, is active, and you can run EMAN2/SPARX/SPHIRE commands.
If this causes issues for other software, you can type conda deactivate and EMAN2 commands will no longer work (but any software that doesn't like Anaconda will work).
Alternatively, you can type conda config --set auto_activate_base False, which will prevent Anaconda from being activated automatically when you open new shells. In that case you will need to do a conda activate before running EMAN2/SPARX/SPHIRE commands.
Check continuous build sections, Notes and Troubleshooting, which may contain more up-to-date info that may be relevant here.
Option 1: Standard Binary Install (Mac)
IMPORTANT: M1/M2 Macs - The Mac binaries we currently provide here are Intel binaries using Intel Anaconda. While these will run on M1/2 Macs, they will run much more slowly than they should. Both methods 2 & 3 above will provide Native ARM64 binaries (strongly recommended).
Cleanup: Only if you have a pre-Anaconda install of EMAN2 on your machine:
- Please remove or rename any existing installed EMAN2 folder you might have.
- Please remove any existing EMAN2 entries from PATH.
- LD_LIBRARY_PATH, DYLD_LIBRARY_PATH, PYTHONPATH and PYTHONHOME are NO LONGER USED, and should be removed if you have them set.
- If you have any of these shell variables set for use with other software, it may be necessary to remove those settings as well. If the tests below fail after installation, this is the first thing to check.
Download: Download EMAN2.99.47
Install:
1 bash <path-to-EMAN2-installer>- You will be prompted for a location to install EMAN2. Note that you cannot rename this folder after installation! You must reinstall if you wish to move/rename the installation.
- You will be asked if you want to initialize EMAN2 (conda init). Answer yes, or you won't have access to the 'conda' command in your shell.
EMAN2 initialization will add a block of code to your .profile/.bashrc/.zshrc file. You may check this file after installation to make sure an Anaconda block exists.
Close your current terminal window (you may actually want to log out completely), then open a new terminal. The new terminal should have access to the 'conda' command. If you see (base) at the beginning of your command line, then Anaconda is active, and the following tests can be run. If you want to stop using EMAN2, you can run conda deactivate.
Test: Run these programs to see if the install worked:
   1 # This will display the exact version you have installed. If you ask for help, provide the full output of this command.
   2 e2version.py
   3 # Relative speed factor of a single core on your computer, 2-3 typ.
   4 e2speedtest.py
   5 # Opens a browser window you can use to view any EMAN2 compatible file in various ways
   6 e2display.py
   7 # Creates a small image with a circle in the middle of it
   8 e2proc2d.py :64:64:1 test.hdf --process mask.sharp:outer_radius=24
   9 # Displays the file you just created
  10 e2display.py test.hdf
Tips and Troubleshooting
If you don't understand what the .profile instructions are talking about, this may help: https://stackoverflow.com/questions/7501678/set-environment-variables-on-mac-os-x-lion
Beginning with Big Sur (MacOS 11) there are new security features which require you to give software permission to access specific folders. This can cause problems for many open-source software packages launched from the command line. The easiest solution is Preferences -> Security & Privacy -> Privacy -> Full Disk Access, and give Terminal full access. This will not solve every problem, and you need to be aware of potential security risks in doing this, but for most scientific users it is a good solution.
- M1/M2 Macs: Anaconda does not yet fully support native M1 software, so you will need to install the normal Mac build. The installer will say that you appear not to be running on a 64 bit machine, and ask if you wish to install anyway. Say YES. Performance is excellent even though it isn't a native build.
If you get an error like the one below, dependency installation step might have failed.
Traceback (most recent call last):
  File "/.../.../eman2/bin/e2proc3d.py", line 35, in <module>
    from past.utils import old_div
ModuleNotFoundError: No module named 'past'
Run the dependency installation manually.
conda install eman-deps=25 -c cryoem -c defaults -c conda-forge
- If you have problems with any of the test programs, the first thing to check is whether you have PYTHONPATH, PYTHONHOME, LD_LIBRARY_PATH or DYLD_LIBRARY_PATH set in your shell. While used in previous versions of EMAN, variables are no longer used, and in some cases may interfere with Anaconda. If they are set to make some other software package work, but they interfere with the EMAN2 programs above, you will have to unset them, and set them only when you need the other software.
- You will find that when you open a new shell, you will see (base) added to your command prompt. This indicates that Anaconda, the environment EMAN2 now uses for distribution, is active, and you can run EMAN2/SPARX/SPHIRE commands.
If this causes issues for other software, you can type conda deactivate and EMAN2 commands will no longer work (but any software that doesn't like Anaconda will work).
Alternatively, you can type conda config --set auto_activate_base False, which will prevent Anaconda from being activated automatically when you open new shells. In that case you will need to do a conda activate before running EMAN2/SPARX/SPHIRE commands.
Check continuous build sections, Notes and Troubleshooting, which may contain more up-to-date info that may be relevant here.
Windows 10/11 WSL
Windows 10/11 includes an embedded Ubuntu Linux environment. With up to date versions of WSL, it shouldn't be necessary to install additional dependencies. You will need to have WSL configured with your favorite Linux distribution first: WSL You will also need to know something about using WSL/Linux.
Once you have WSL installed and running to your satisfaction, simply follow the Linux Installation Instructions
Windows Native
We are no longer consistently providing native windows binaries for EMAN2. We strongly encourage use of the WSL approach to use EMAN2 (and other open source software) on Windows machines. The Native binaries never supported complete EMAN2/SPARX/SPHIRE functionality, and it really isn't the best approach moving forward.
Windows 10 Legacy WSL
If you are running an out of date WSL environment, you really should update then follow the WSL instructions above. However, these older instructions may be useful if you try to proceed:
It is possible to run the EMAN2 Linux binaries within this Win10 environment, but you will need to install some additional dependencies to do so. Also, you will effectively be running at a Linux command prompt, so you will have to become a bit familiar with Linux to do this, but it does avoid installing an additional operating system on your machine.
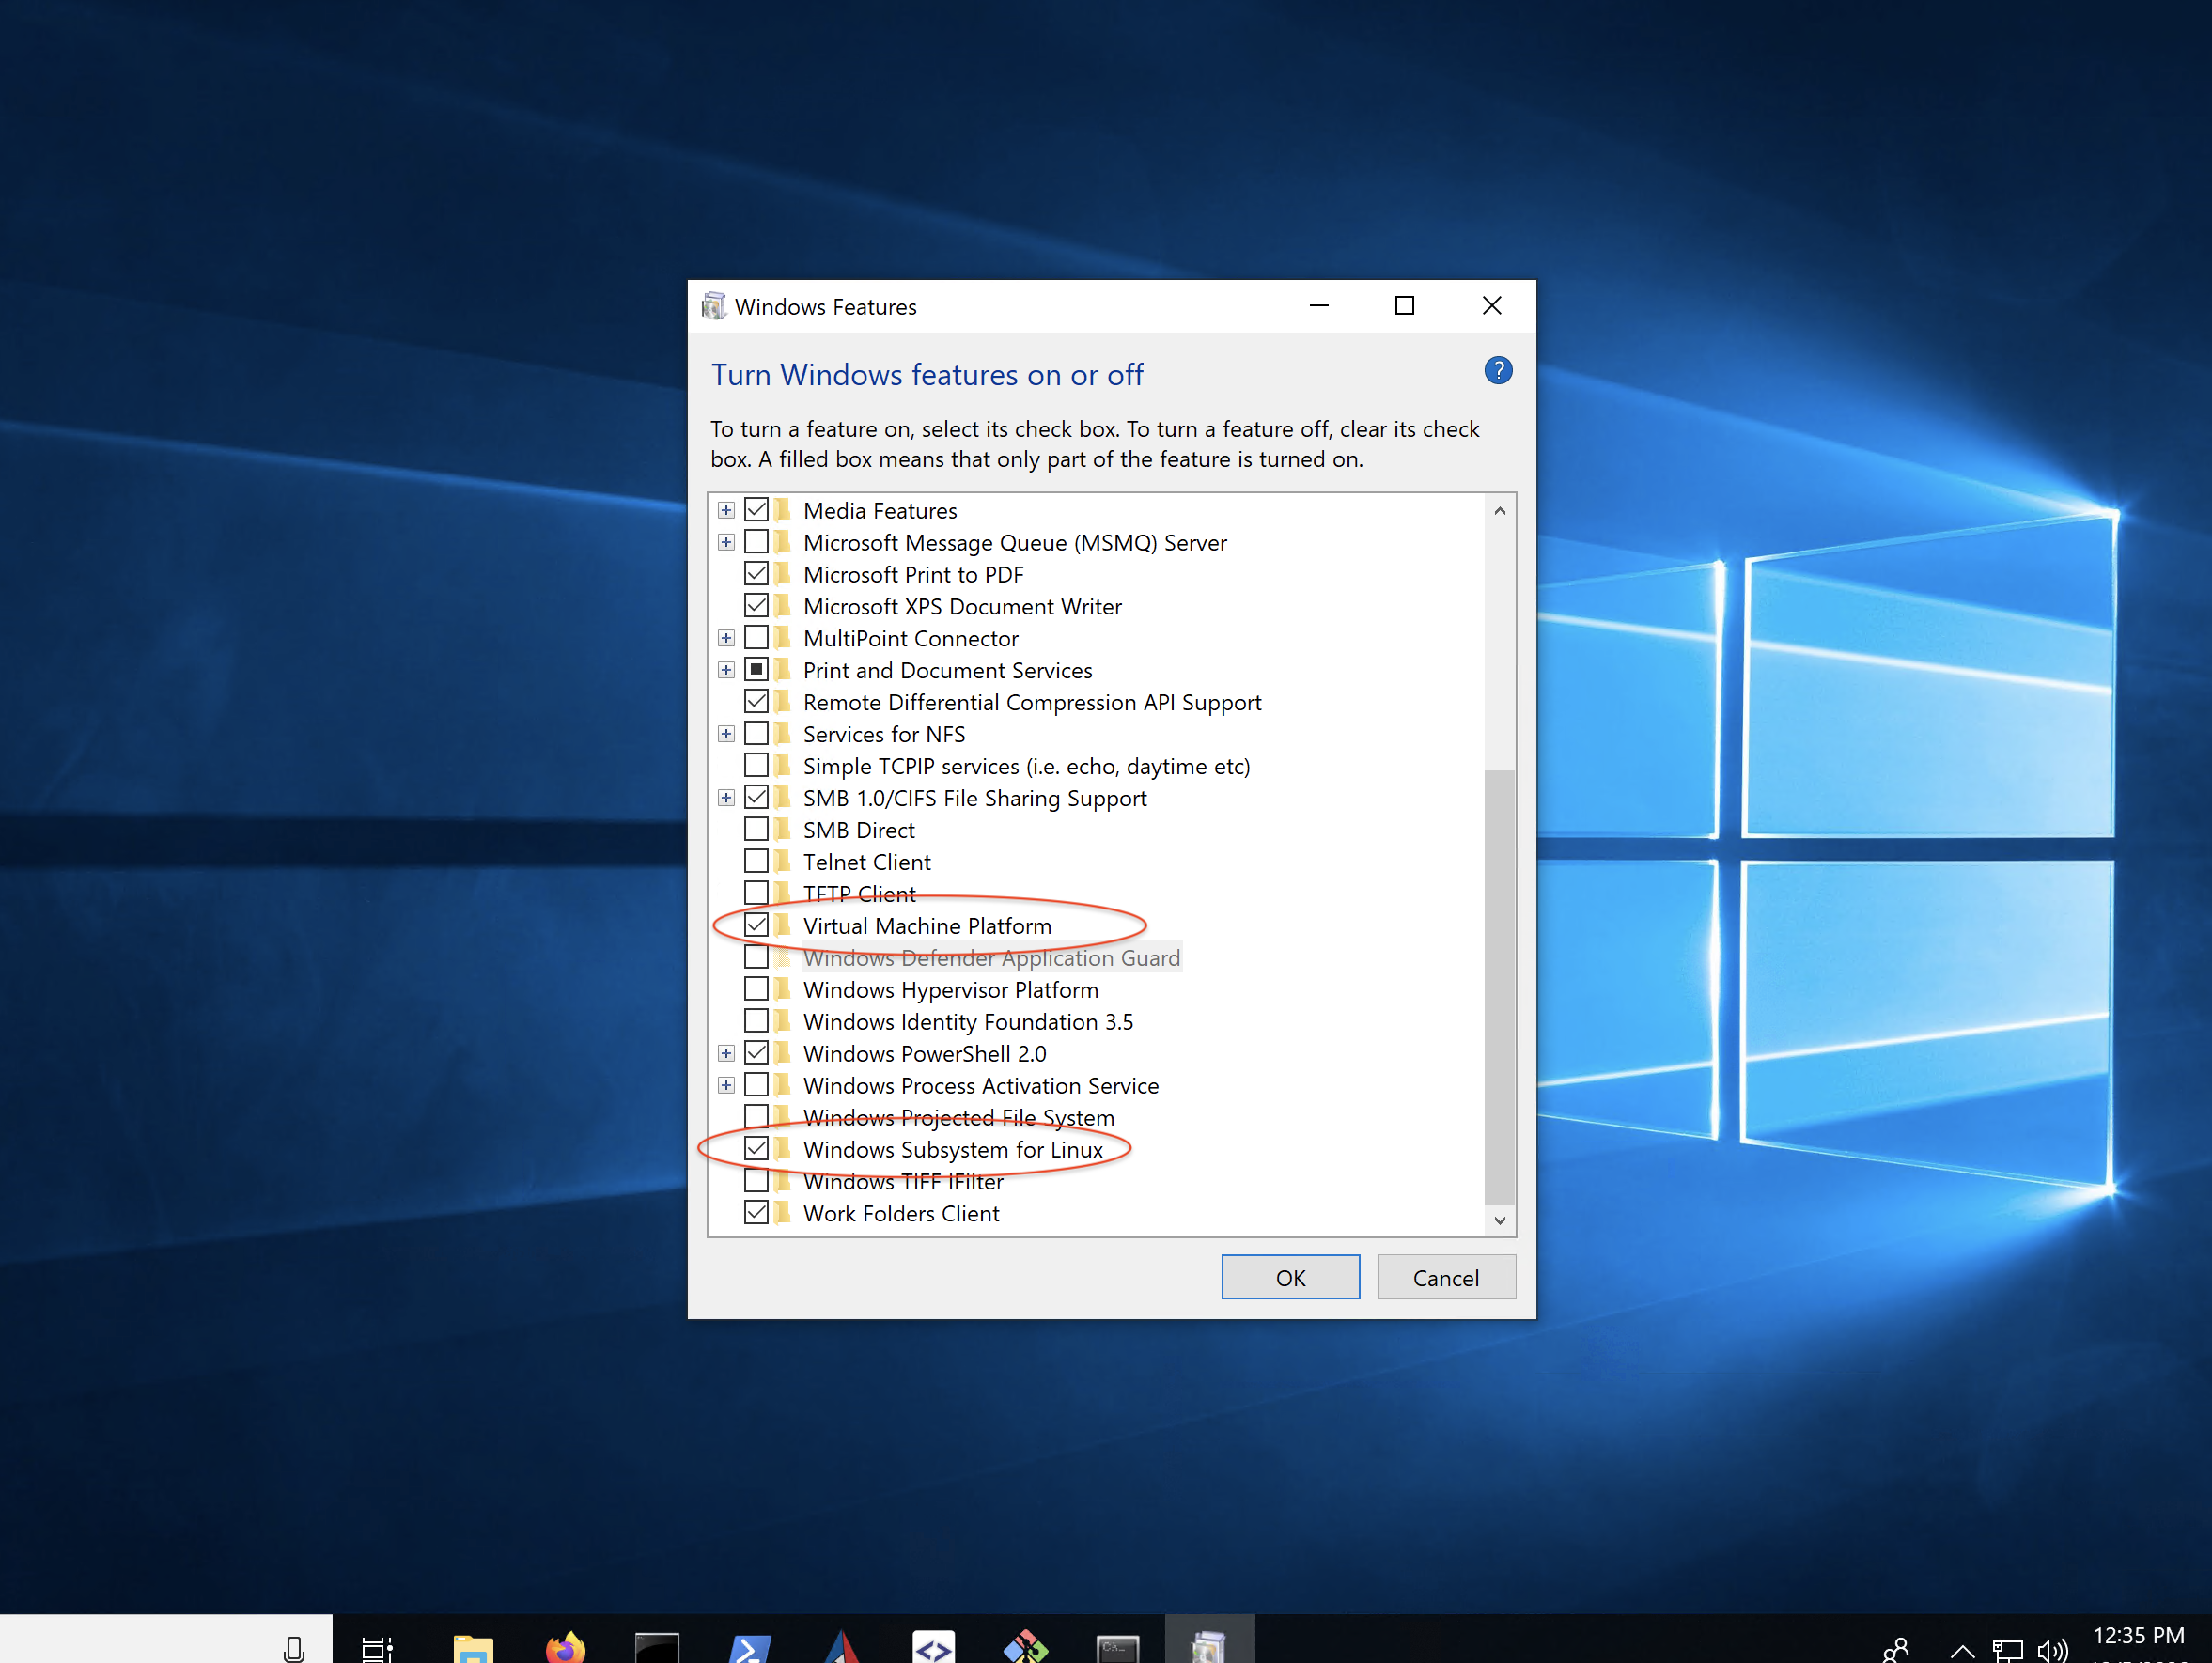
- Click "Start" and type "Turn Windows Features on or off".
- Enable "Windows Subsystem for Linux".
- Enable "Virtual Machine Platform".

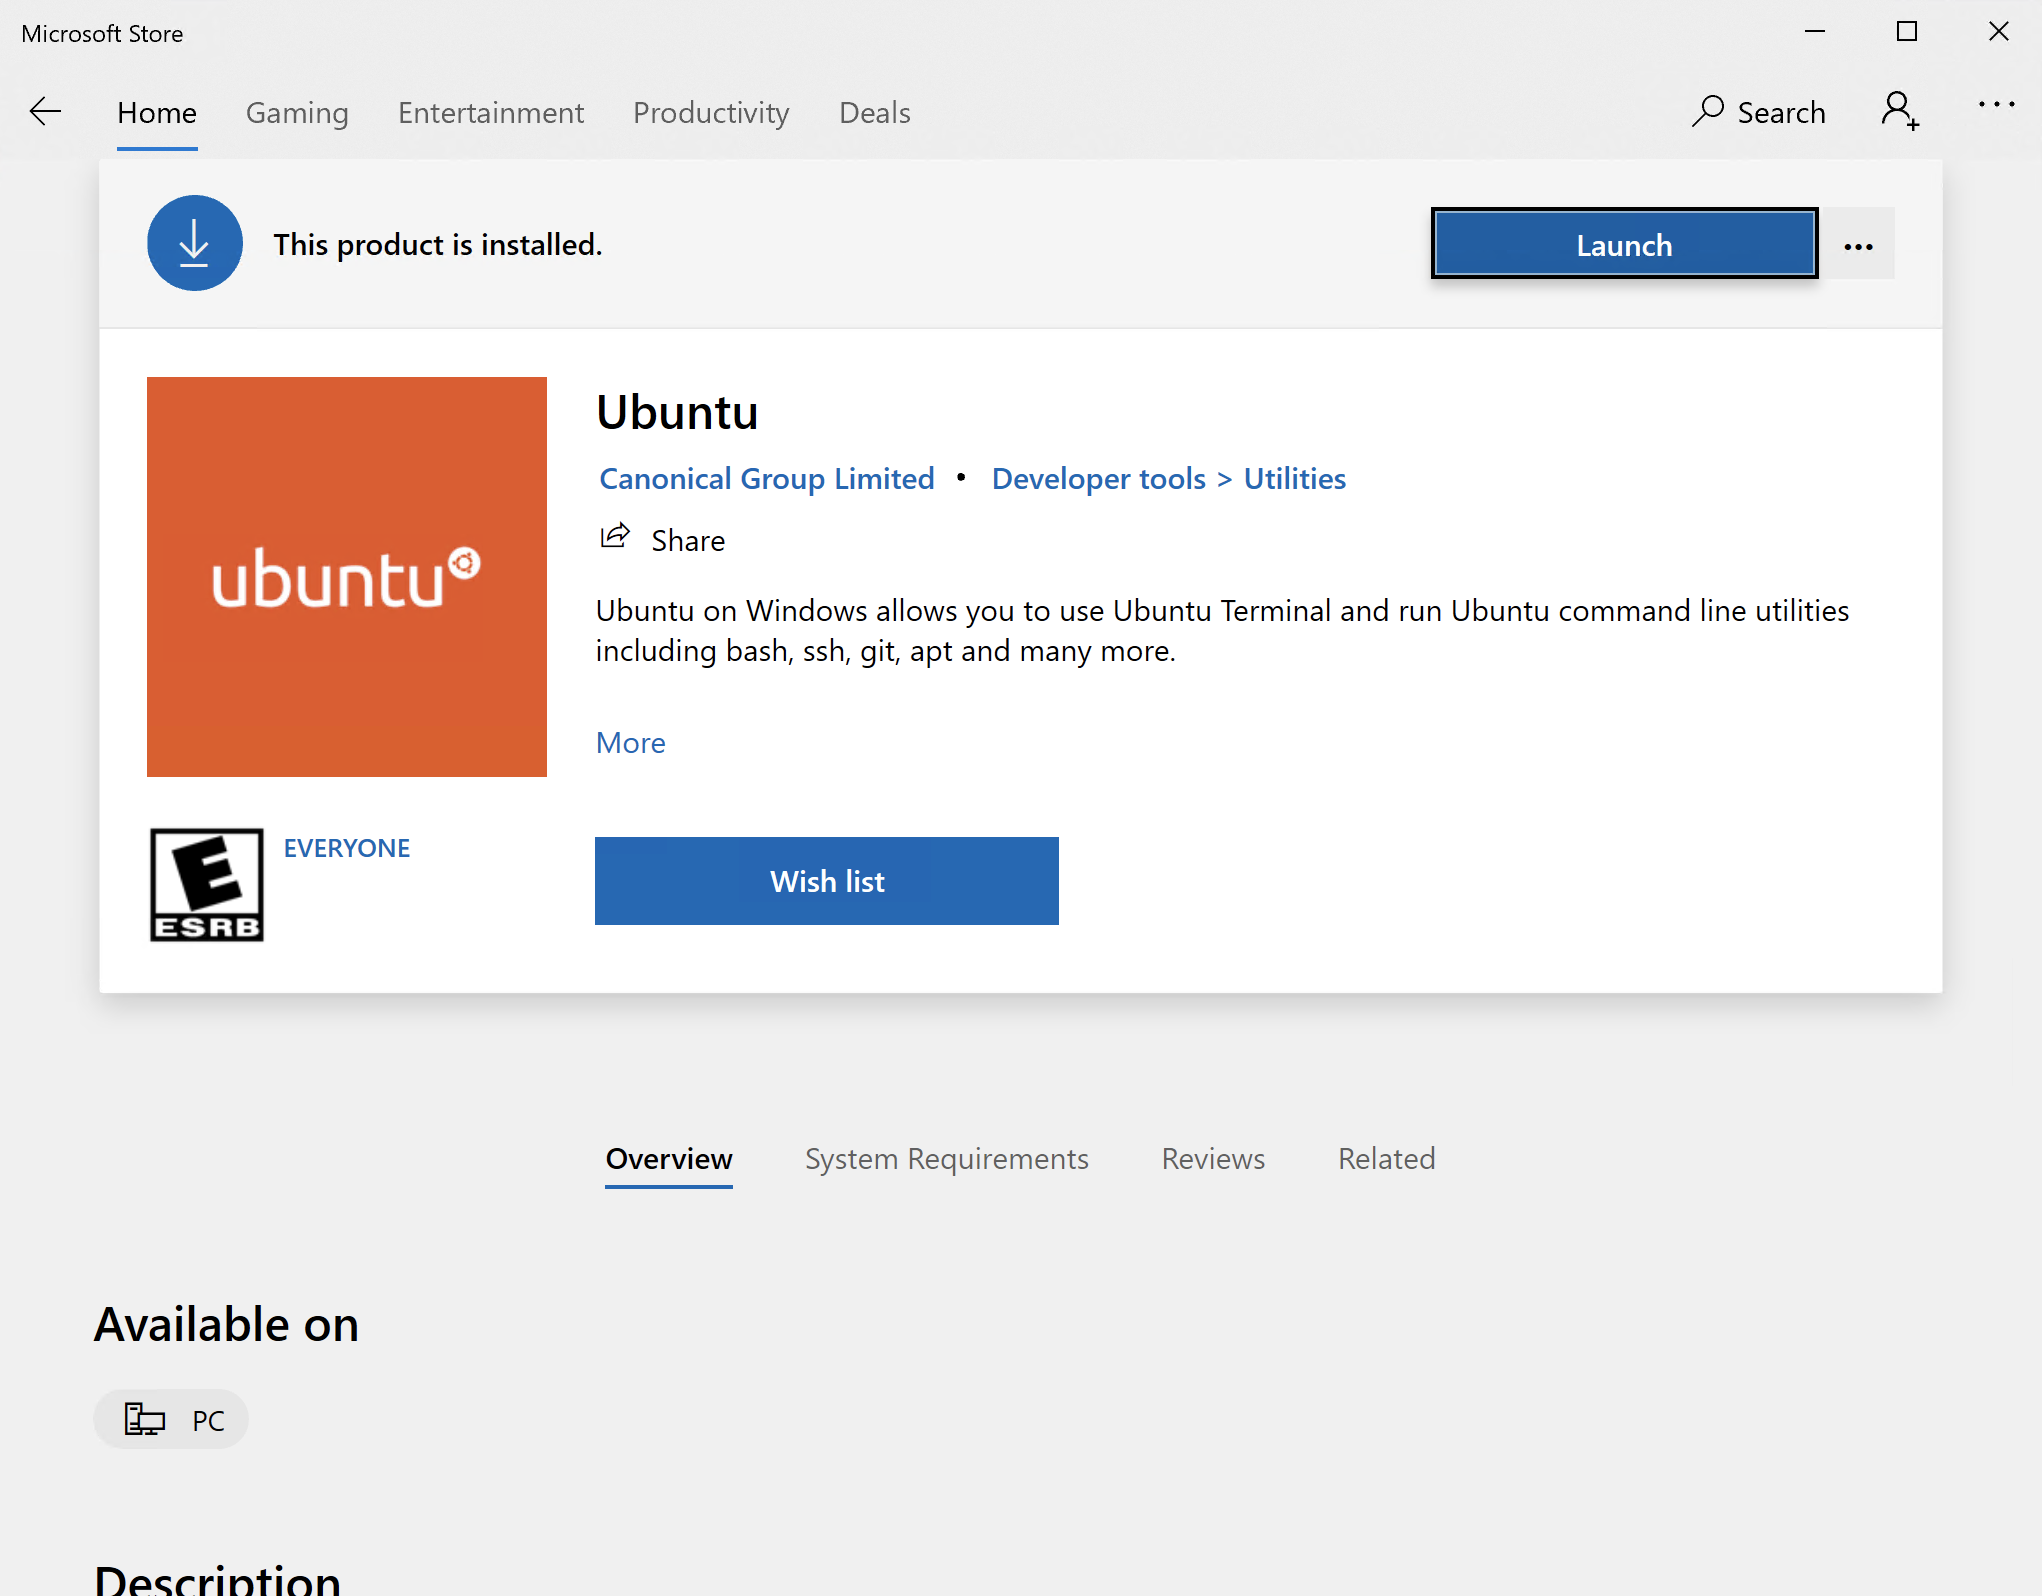
- Install Ubuntu from "Microsoft Store".

- Run "Ubuntu" from Start Menu.
- Install OpenGL.
Install Xming X Server for Windows.
- Don't forget the fonts and Mesa (OpenGL) modules! If it seems to work, but the letters are black boxes, or you have other visual artifacts, the problem is probably with OpenGL support.
Download and install LINUX binary, not windows binary! Download EMAN2.99.47, #Linux.
Make sure to follow the instructions for shell initialization using conda-init.
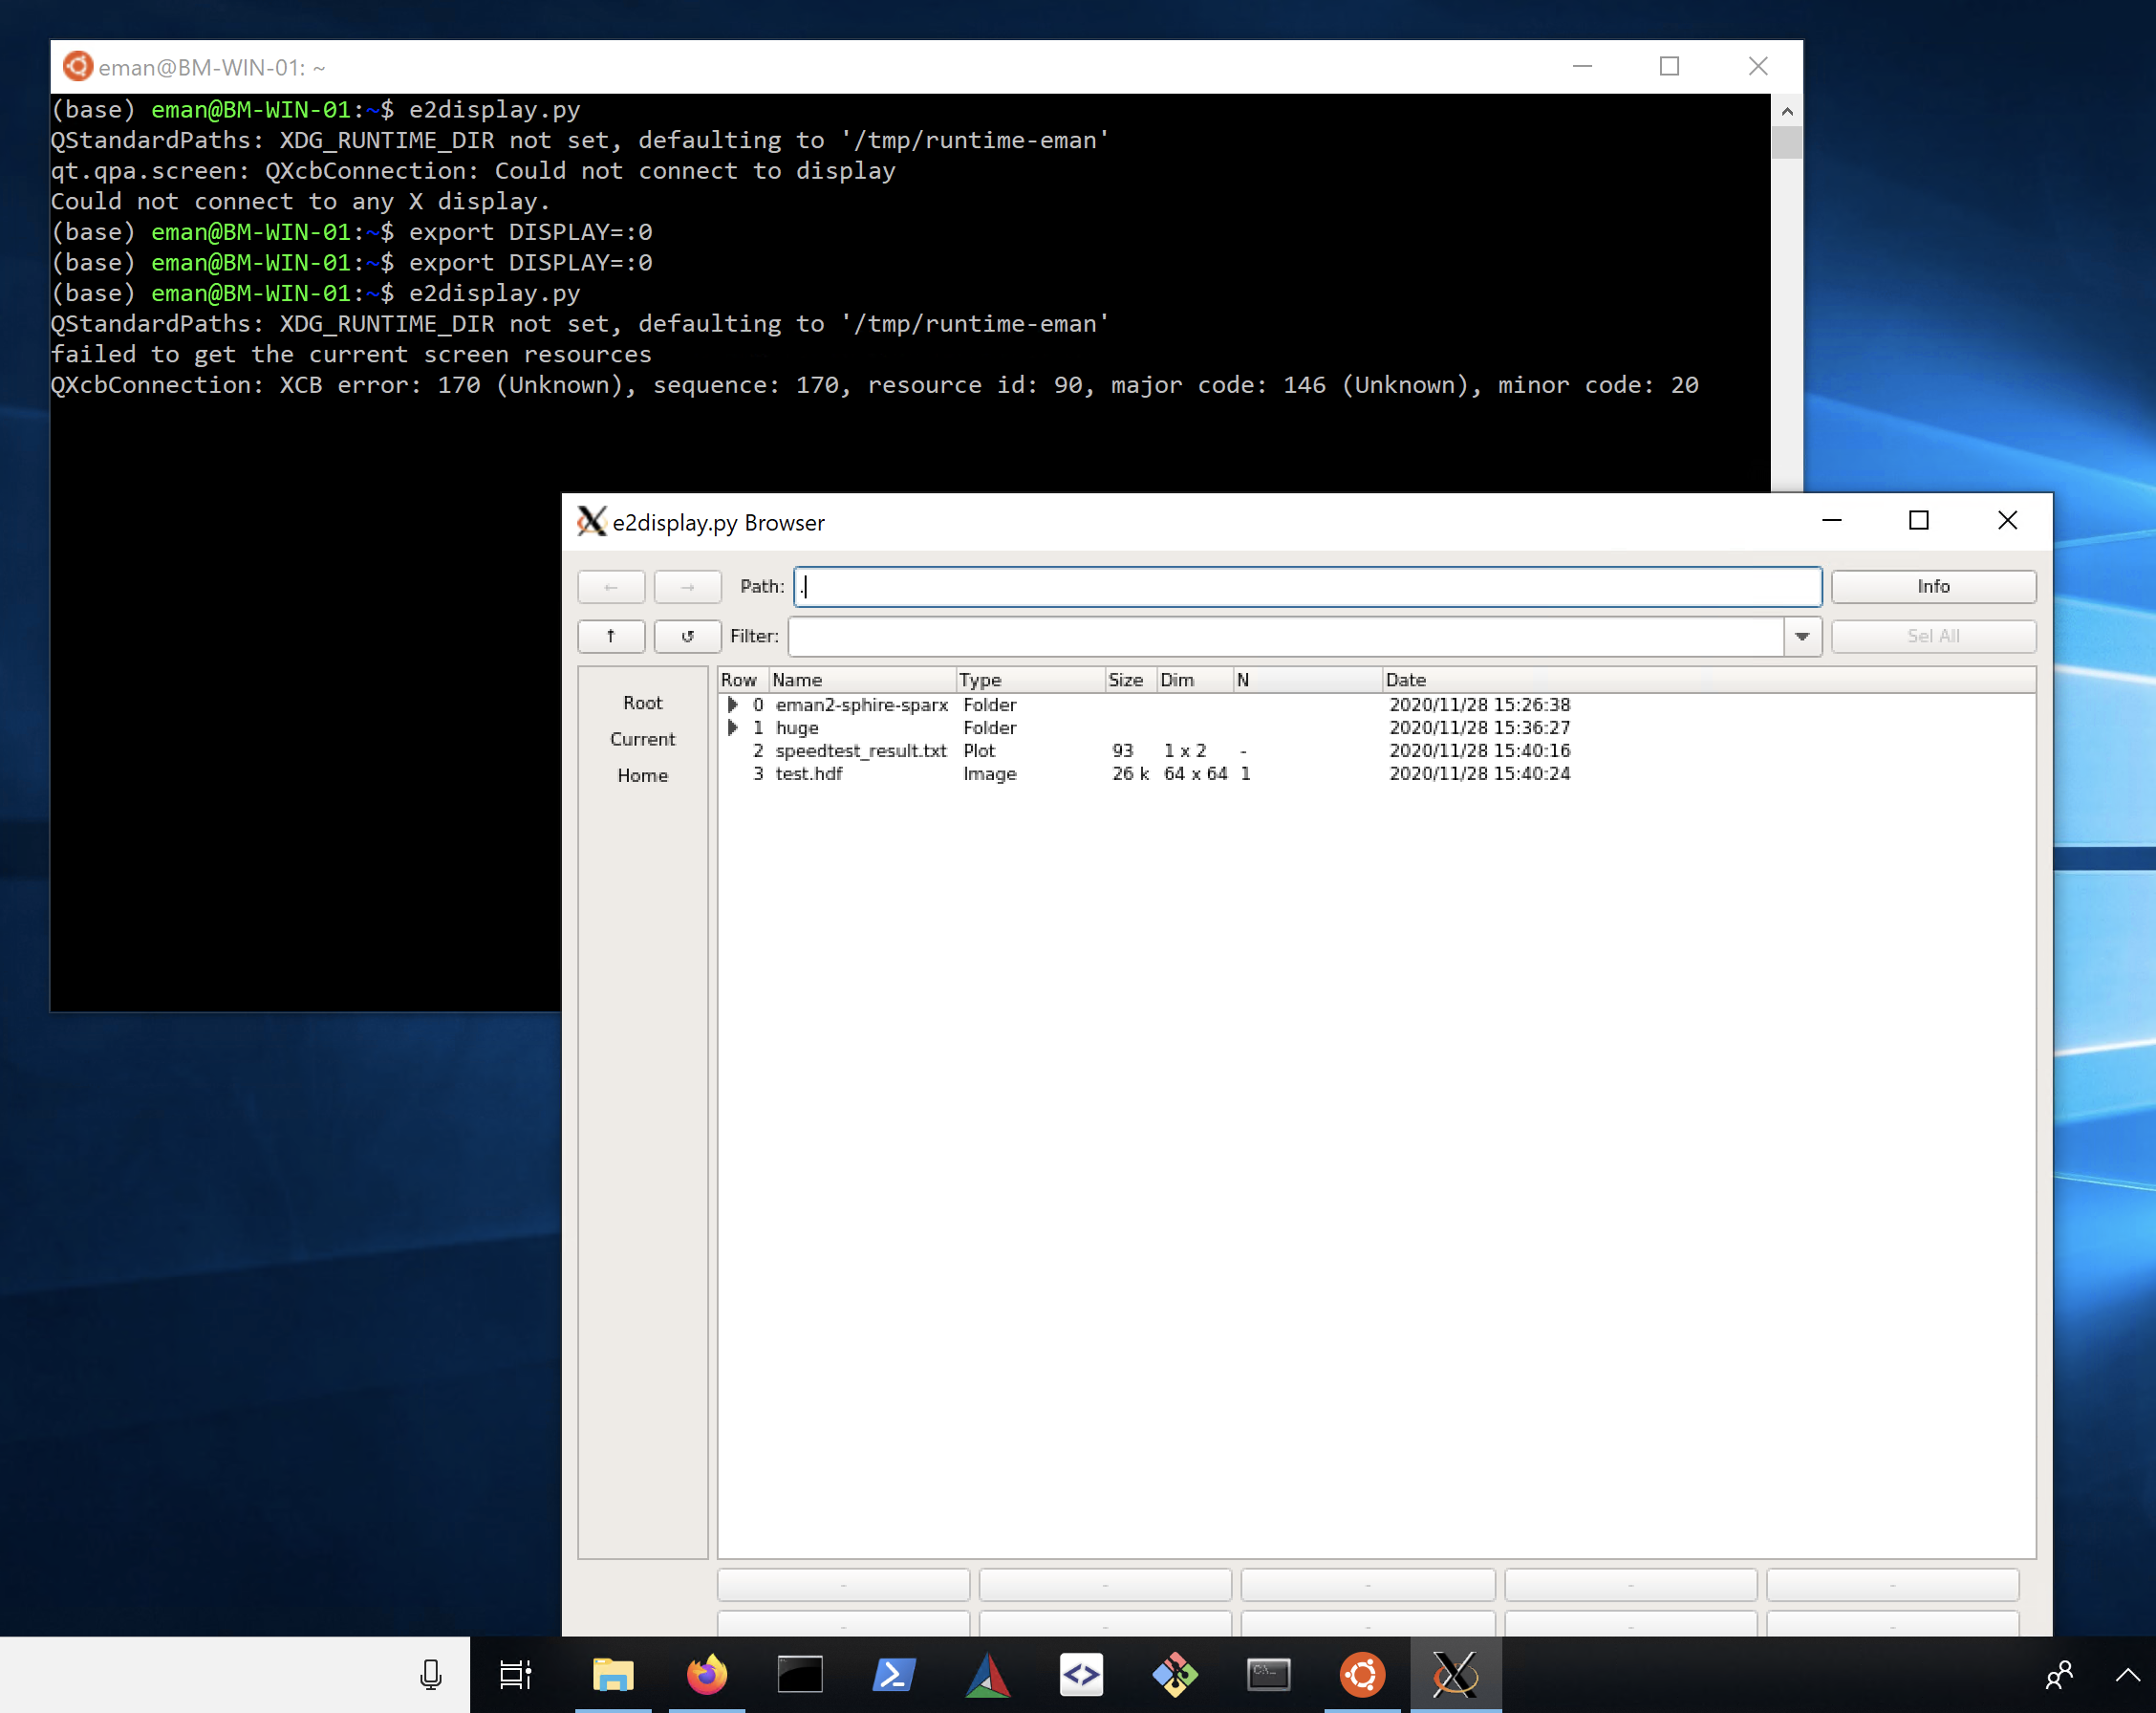
- Start X Server and set environment variables.

- Run these programs to see if the install worked:

Using NVidia GPUs
Currently, GPUs are only used for a few specific programs involving deep learning, such as tomogram annotation, particle picking and GMM variability analysis.
This support is limited to Linux, and (potentially with some extra effort) Win 11 with an LSW2 installation.
Many machines will have CUDA installed already, and if CUDA is an appropriate version, this should work fine with the TensorFlow version shipped with EMAN2. However, if you are running newer versions of CUDA there may be problems. You can test compatibility quickly with:
# Make sure you have your environment set to run EMAN2 programs
e2version.py
# The above command should work and return your current version. If it does, then run:
python -c "import tensorflow"
If this command does not return an error, then you should be able to run deep learning software within EMAN2. If it does raise an error, then you will need to debug the problem:
- If you do not have CUDA installed at all (and you are on a Linux machine with an NVidia GPU):
- Installation depends on linux distribution, try your package manager for CUDA and/or CUDA-toolkit, for example, on Ubuntu:
apt-get install nvidia-cuda-toolkit
- Installation depends on linux distribution, try your package manager for CUDA and/or CUDA-toolkit, for example, on Ubuntu:
- If the version of CUDA you have installed is incompatible, then you will need to get a compatible tensorflow installed in your Anaconda environment. Here is one possible suggestion:
conda remove tensorflow-gpu tensorflow-gpu-base
pip install tensorflow
# read any messages carefully, if there are errors you may need other installations
If you have problems you cannot figure out, feel free to post questions to the EMAN2 Google Group.
