|
Size: 522
Comment:
|
Size: 1690
Comment:
|
| Deletions are marked like this. | Additions are marked like this. |
| Line 5: | Line 5: |
| This tutorial is designed with the assumption that the user has installed Relion on their local machine. Though we do not run the relion_refine program on a local machine, several scripts from the Relion installation package are used to prepare the EMAN2 data for a Relion run. Relion can be downloaded [[http://www2.mrc-lmb.cam.ac.uk/relion/index.php/Main_Page|here]] | ==== Basic Information ==== This tutorial is designed with 2 assumptions in mind: *That the user has installed Relion on their local machine. Though we do not run the relion_refine program on a local machine, several scripts from the Relion installation package are used to prepare the EMAN2 data for a Relion run. Relion can be downloaded [[http://www2.mrc-lmb.cam.ac.uk/relion/index.php/Main_Page|here]] *That the user has fully completed an EMAN2 refinement. This program draws from many files in the EMAN2 directory structure and was designed to rely on these files existing. ==== Tutorial ==== The first thing to do, assuming you've installed Relion and run an EMAN2 reconstruction is to open up the [[EMAN2/Programs/e2projectmanager|Project Manager]]: {{{ e2projectmanager.py }}} {{attachment:Basic Project Manager Window.png|EMAN2 Project Manager|width=600}} Once you open up the project manager, select the plus (+) next to the 3D refinement tab and you will see several new options appear. The option we want to select is the "Relion 3D Refinement" option. INSERT IMAGE HERE This opens up three tabs in the viewing window: GUI, Command, and Help. 'GUI' contains the options for ''e2refinetorelion3d.py'', 'Command' is the command that will be executed when the user launches the program, and 'Help' is the help text associated with ''e2refinetorelion3d.py'. In the 'GUI' window, there are several sections of options. The first set options you will see are the I/O options. ===== I/O Options ===== |
The main documentation for e2refinetorelion3d.py can be found here
e2refinetorelion3d Tutorial
Basic Information
This tutorial is designed with 2 assumptions in mind:
That the user has installed Relion on their local machine. Though we do not run the relion_refine program on a local machine, several scripts from the Relion installation package are used to prepare the EMAN2 data for a Relion run. Relion can be downloaded here
- That the user has fully completed an EMAN2 refinement. This program draws from many files in the EMAN2 directory structure and was designed to rely on these files existing.
Tutorial
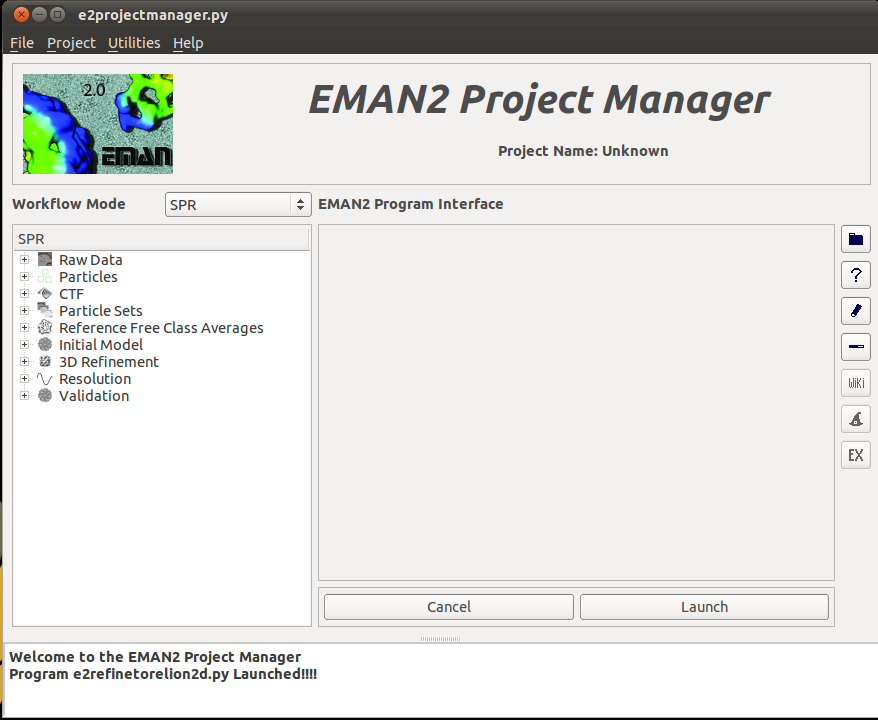
The first thing to do, assuming you've installed Relion and run an EMAN2 reconstruction is to open up the Project Manager:
e2projectmanager.py

Once you open up the project manager, select the plus (+) next to the 3D refinement tab and you will see several new options appear. The option we want to select is the "Relion 3D Refinement" option.
INSERT IMAGE HERE
This opens up three tabs in the viewing window: GUI, Command, and Help. 'GUI' contains the options for e2refinetorelion3d.py, 'Command' is the command that will be executed when the user launches the program, and 'Help' is the help text associated with e2refinetorelion3d.py'. In the 'GUI' window, there are several sections of options. The first set options you will see are the I/O options.
I/O Options
