Render structures using Unreal Engine
This is not strictly EMAN2 related, but I have been showing short videos around (example) and people ask how to make them. So here is a simple tutorial. To start,
- Install Unreal Engine 5.
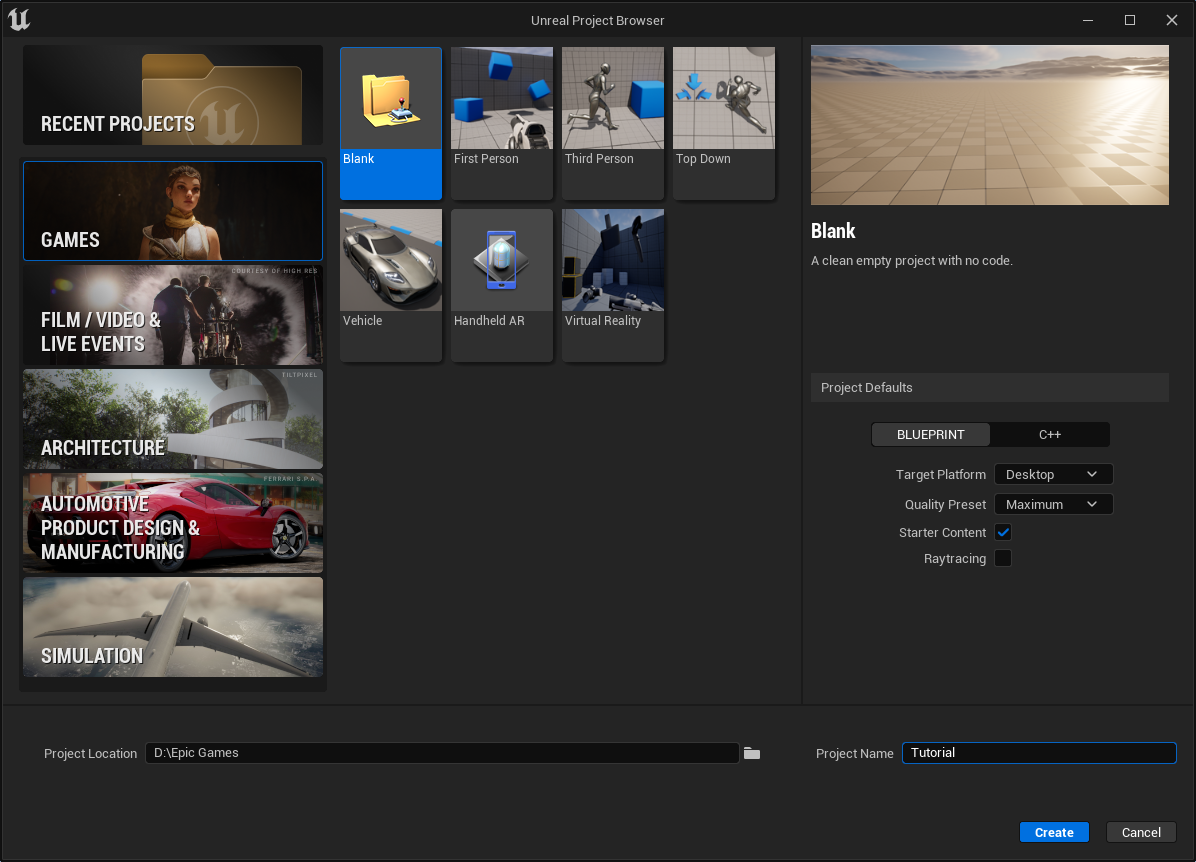
- Start a new blank project.
Prepare mesh file using ChimeraX
Here I use actin as an example. In ChimeraX command line, run
open 5ONV
open emdb:3835
Before import to Unreal, we need to make sure the model is aligned to symmetry axis. Center the EMDB map using Volume -> Map Coordinates -> Center, then fit the PDB to the map. Select two actin chains, then run
surface sel resolution 3 enclose sel
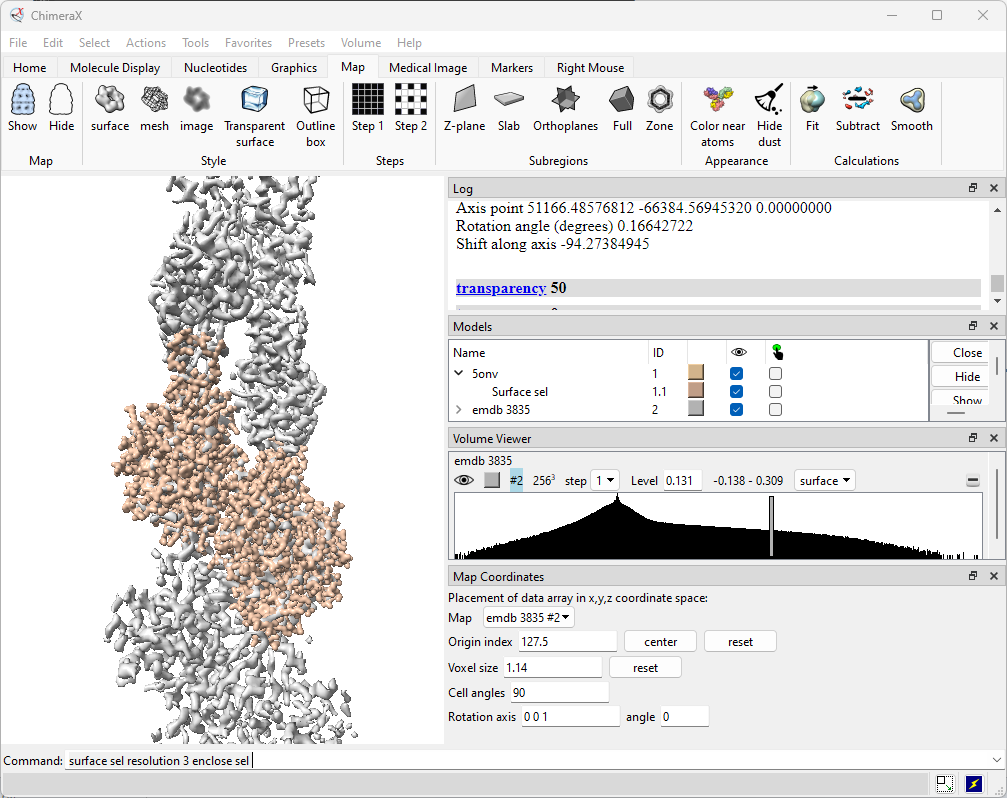
Hide everything other than the surface view of the two actin chains, and run the following command, replacing xxx with your own path for file storage.
save xxxx/actin.glb center false
Import mesh to Unreal
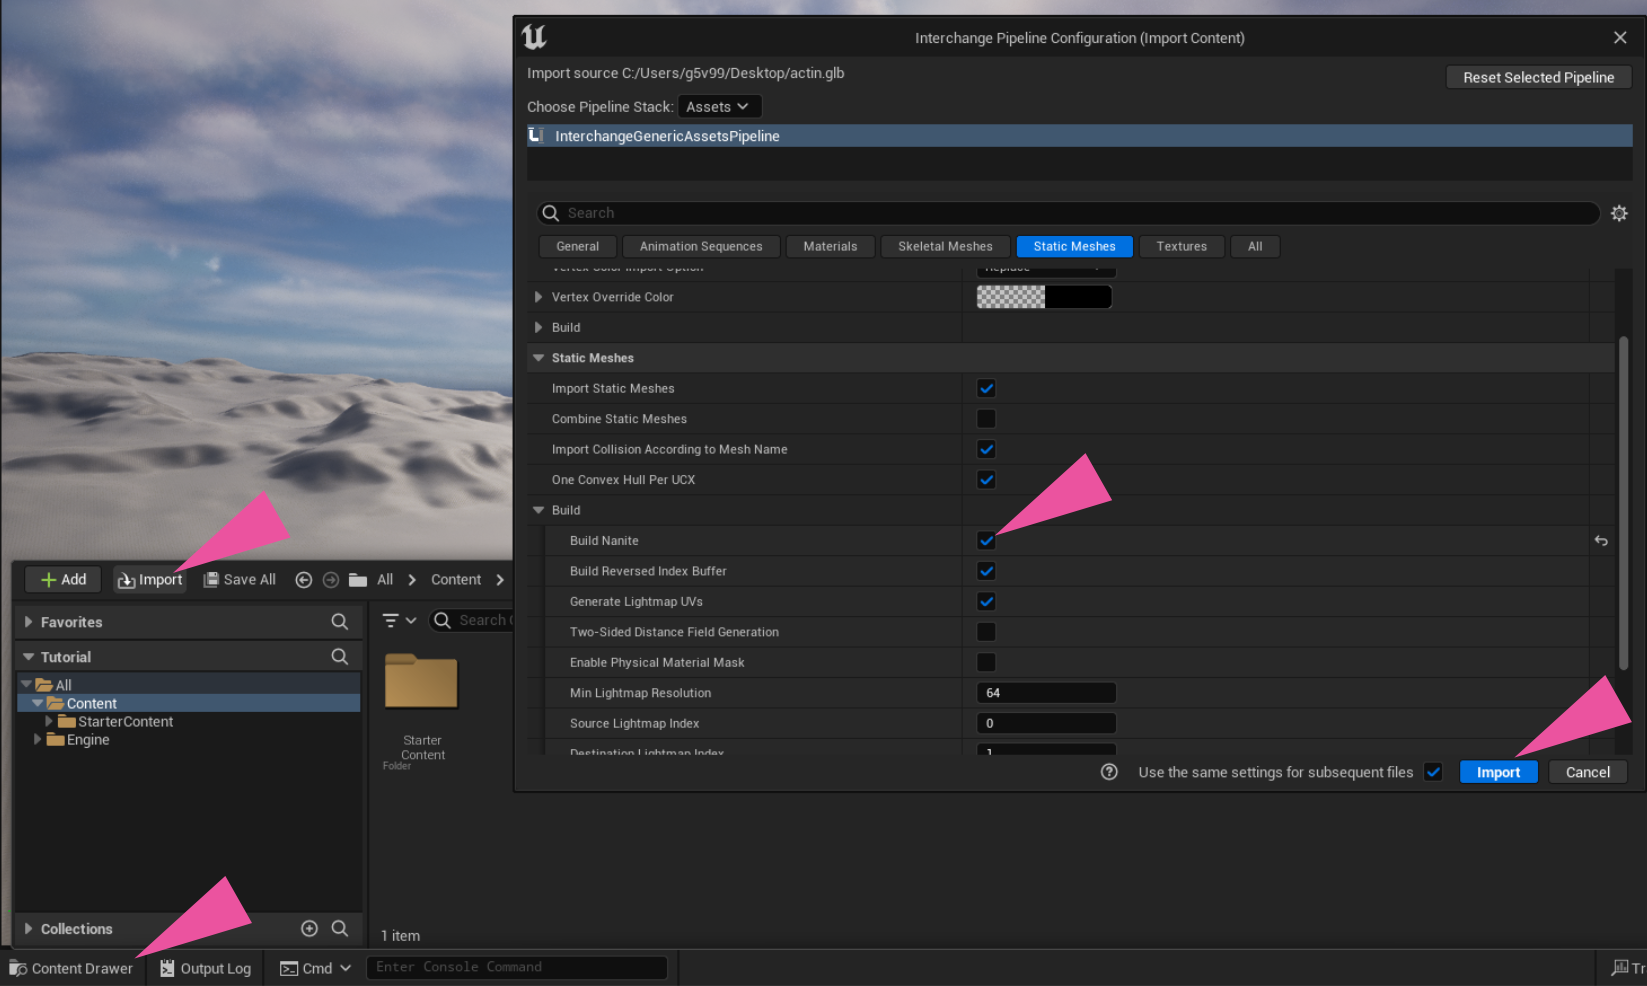
Now back to Unreal. Click Content Drawer -> Import, select the glb file from ChimeraX and click Open. In the import window, find Build Nanite and check the box. Click Import
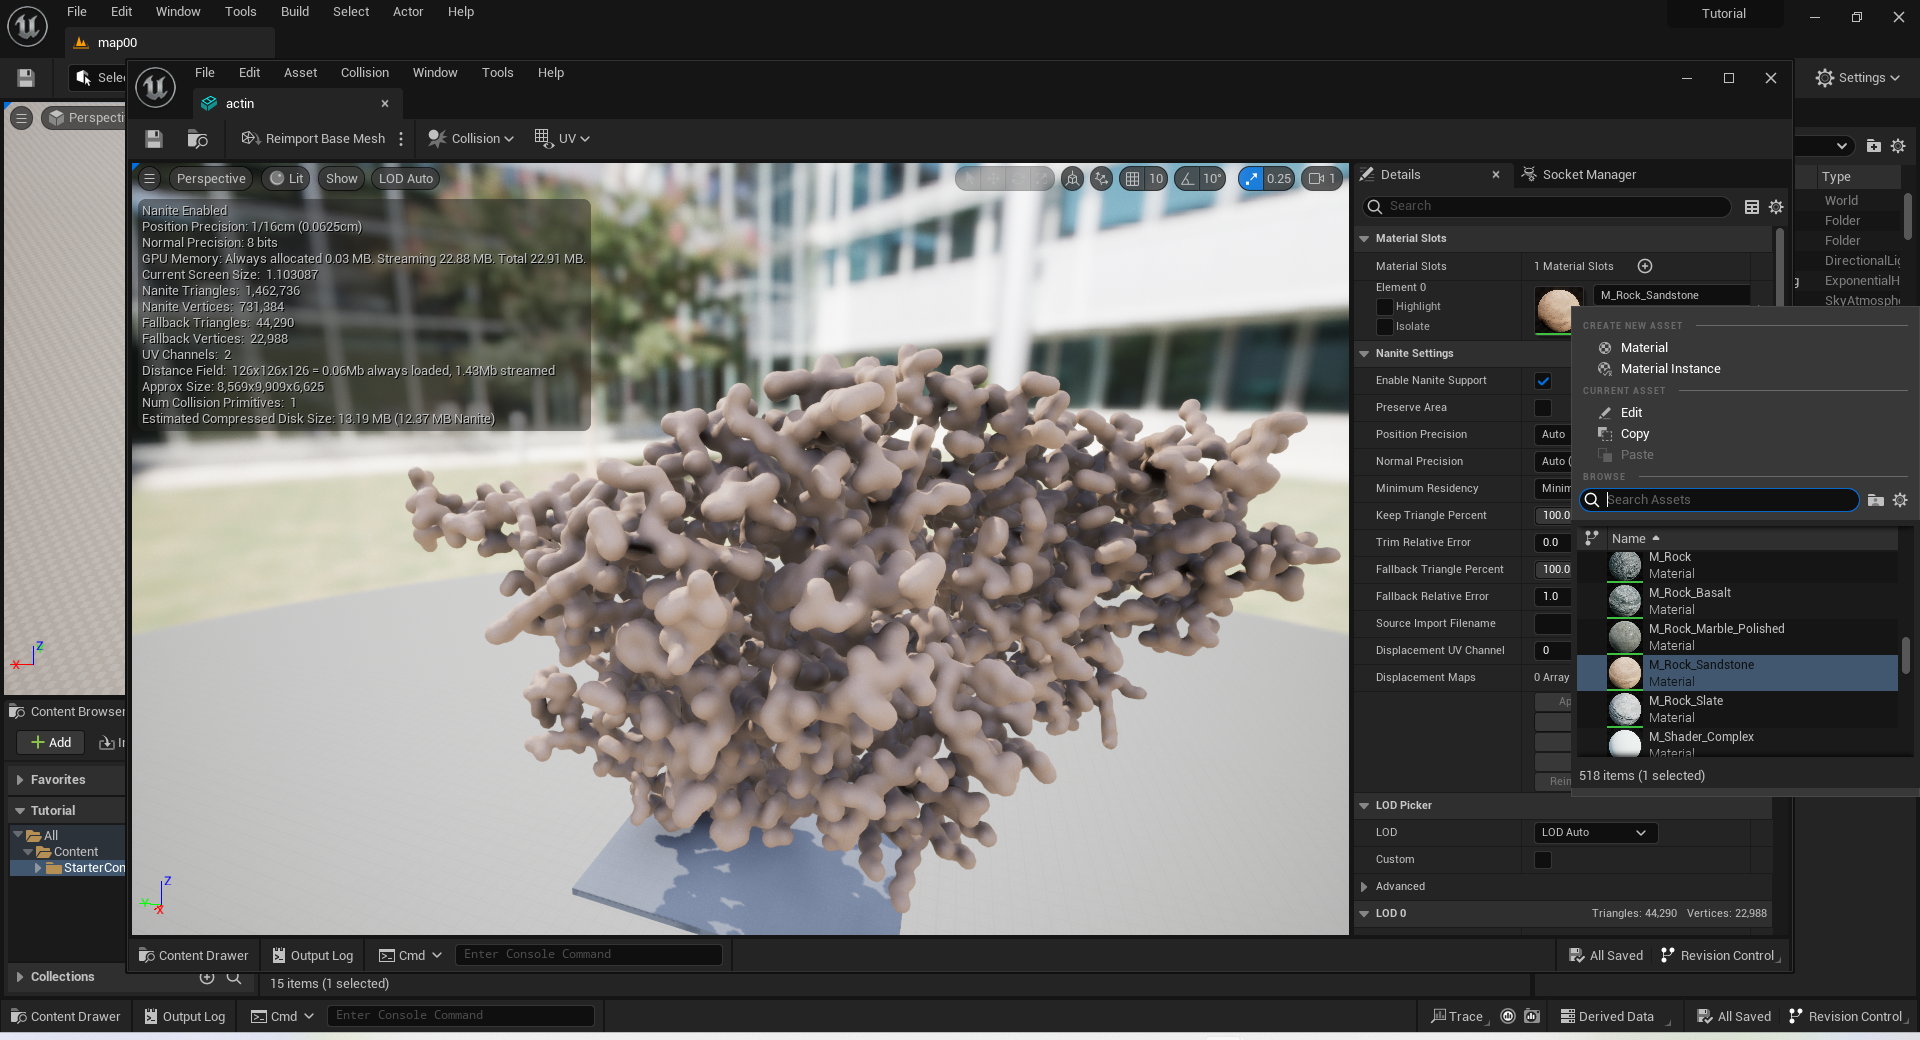
Open the imported mesh actin from the Content Drawer. Make sure it looks correct, and pick a material for it. I use M_Rock_Sandstone here.
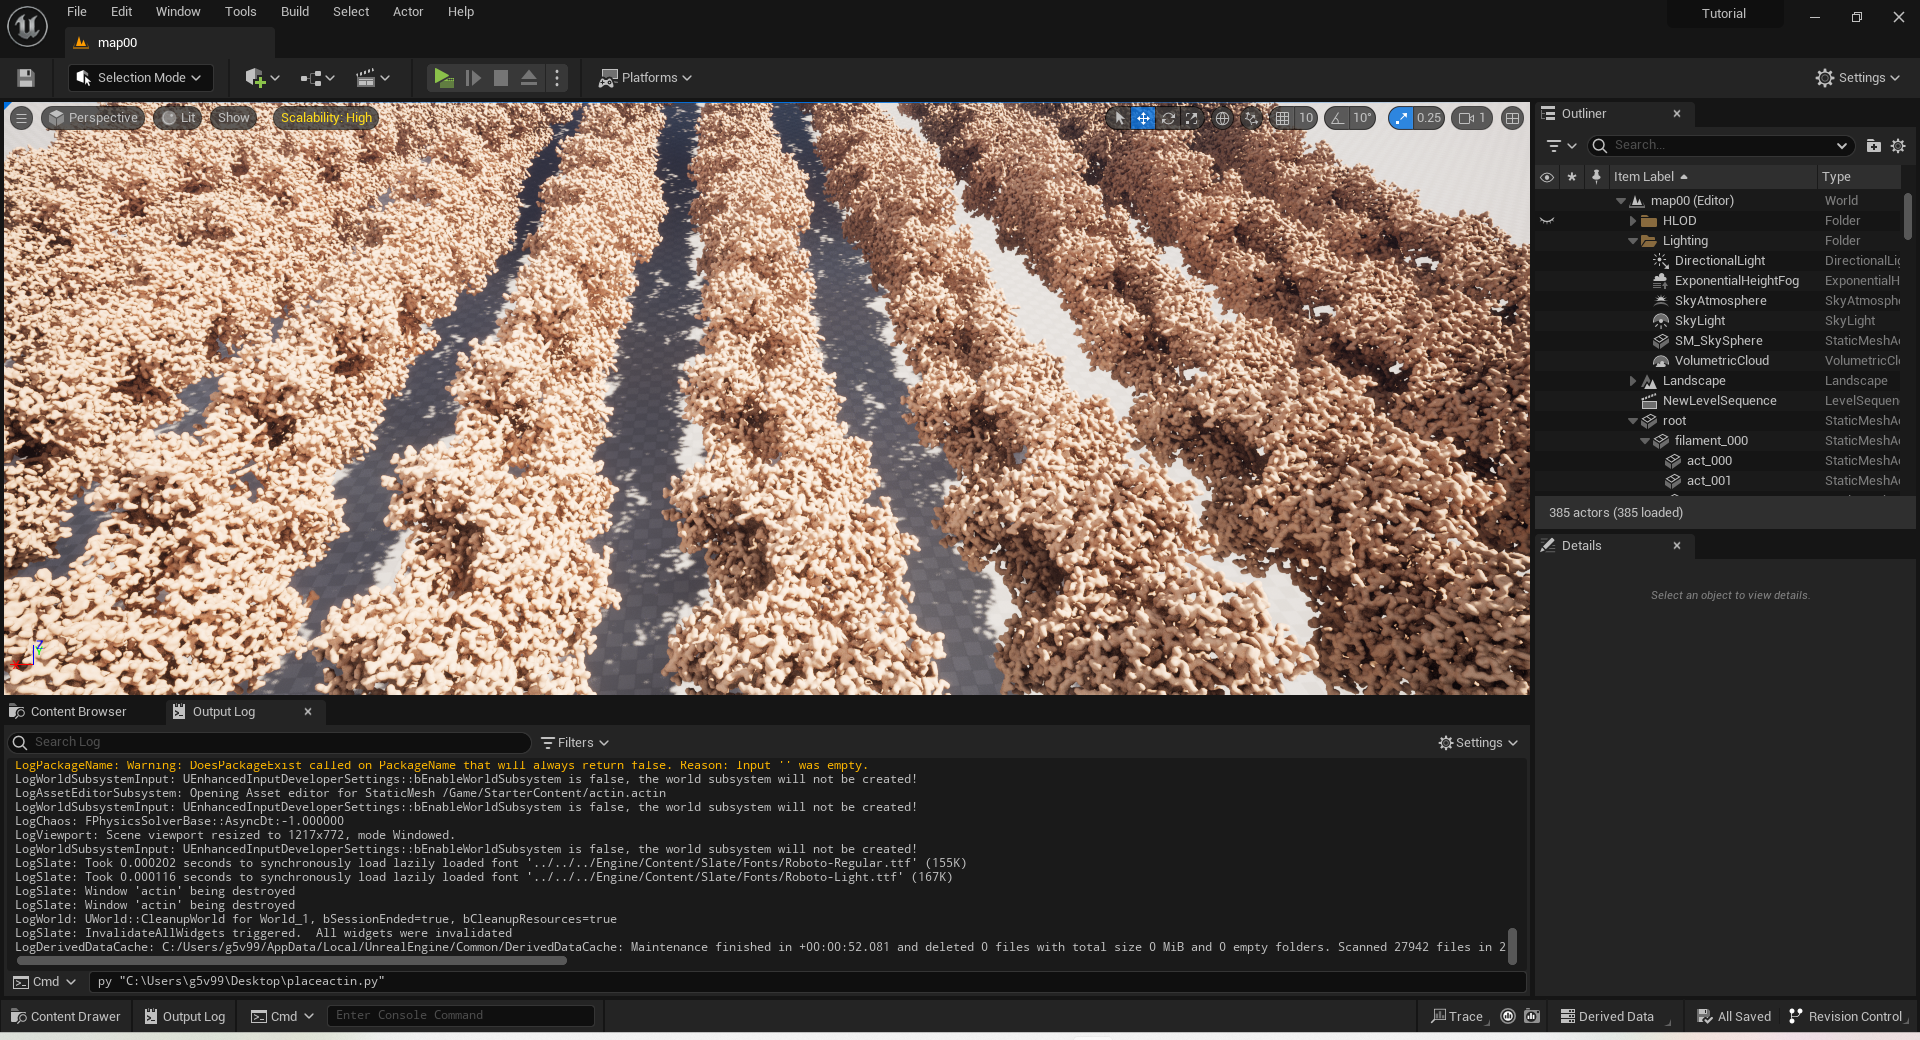
To place one object into the scene, simply drag it from the Content Drawer into the editor view. However, to place many object, particulalry with symmetry, it is easier to write a python script. Here is the script I use.
import unreal

scale=0.1
zz=2000
obj=unreal.EditorAssetLibrary.load_asset("/Game/actin.actin")

root=unreal.EditorLevelLibrary.spawn_actor_from_class(unreal.StaticMeshActor,(0,0,zz))
root.set_actor_label("root")

for xx in range(10):
        filament=unreal.EditorLevelLibrary.spawn_actor_from_class(unreal.StaticMeshActor,(xx*1000,0,zz))
        filament.attach_to_actor(root,"none",unreal.AttachmentRule.KEEP_WORLD,unreal.AttachmentRule.KEEP_WORLD,unreal.AttachmentRule.KEEP_WORLD)
        filament.set_actor_label(f"filament_{xx:03d}")#
        for yy in range(30):
                act=unreal.EditorLevelLibrary.spawn_actor_from_object(obj,(xx*1000,yy*273*2,zz), (-2*yy*166.15+xx*30,0,0))
                act.set_actor_relative_scale3d((scale, scale, scale))
                act.attach_to_actor(filament,"none",unreal.AttachmentRule.KEEP_WORLD,unreal.AttachmentRule.KEEP_WORLD,unreal.AttachmentRule.KEEP_WORLD)
                act.set_actor_label(f"act_{yy:03d}")
This will place 10 actin filament, each 10 nm apart. Each filament contains 60 actin units, following the helical symmetry of the filament. The unit of ChimeraX output is 0.01A. To fit everything in the scene, I use a scale factor of 0.1, so 1 unit distance in Unreal would be 0.1A. The F-actin rises 27.3A per unit. Since we have two actin chains in the model, here we set the rise to 273x2, and rotate -166.15x2 degrees for each object. Save the file as placeactin.py in your own folder.
To run the script in Unreal, run the following command in the Cmd box. Replace xxx with your folder.
py "xxx/placeactin.py"
Now you should see the actin filament in the editor view. Navigate in the editor by holding mouse right button and press WASD.
Make movie
To make movies, add a level sequence, and add a camera in the sequence.
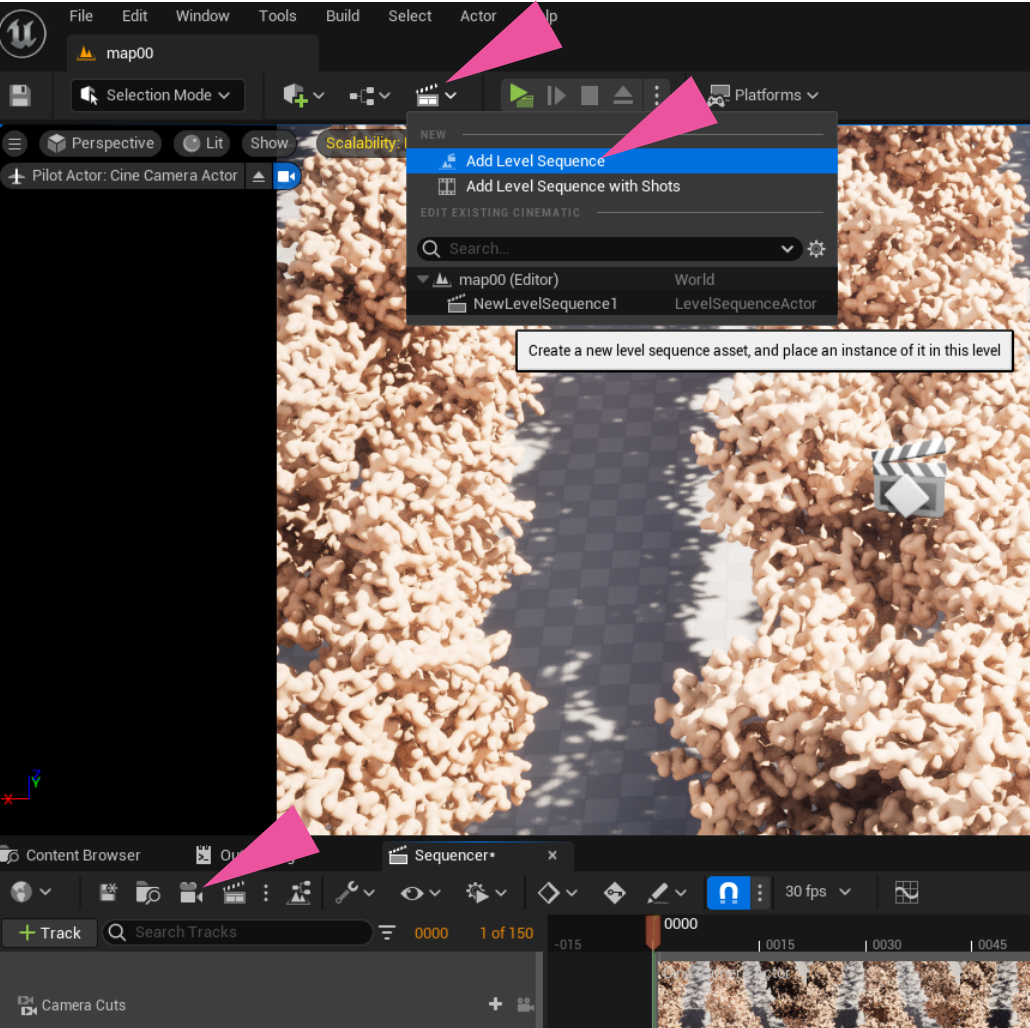
To move the camera, go to the first frame, and add a new key for camera transform at the frame. Then go to the last frame, move the camera to the target location, and add another key for camera transform. Play the sequence, and the camera should move smoothly through the scene.

To move an object, add that object to the sequencer by clicking +Track -> Actor to Sequencer -> Add "filament_000". In the Transform track of the new object, rotate-translate the object at different time frames like you move the camera.

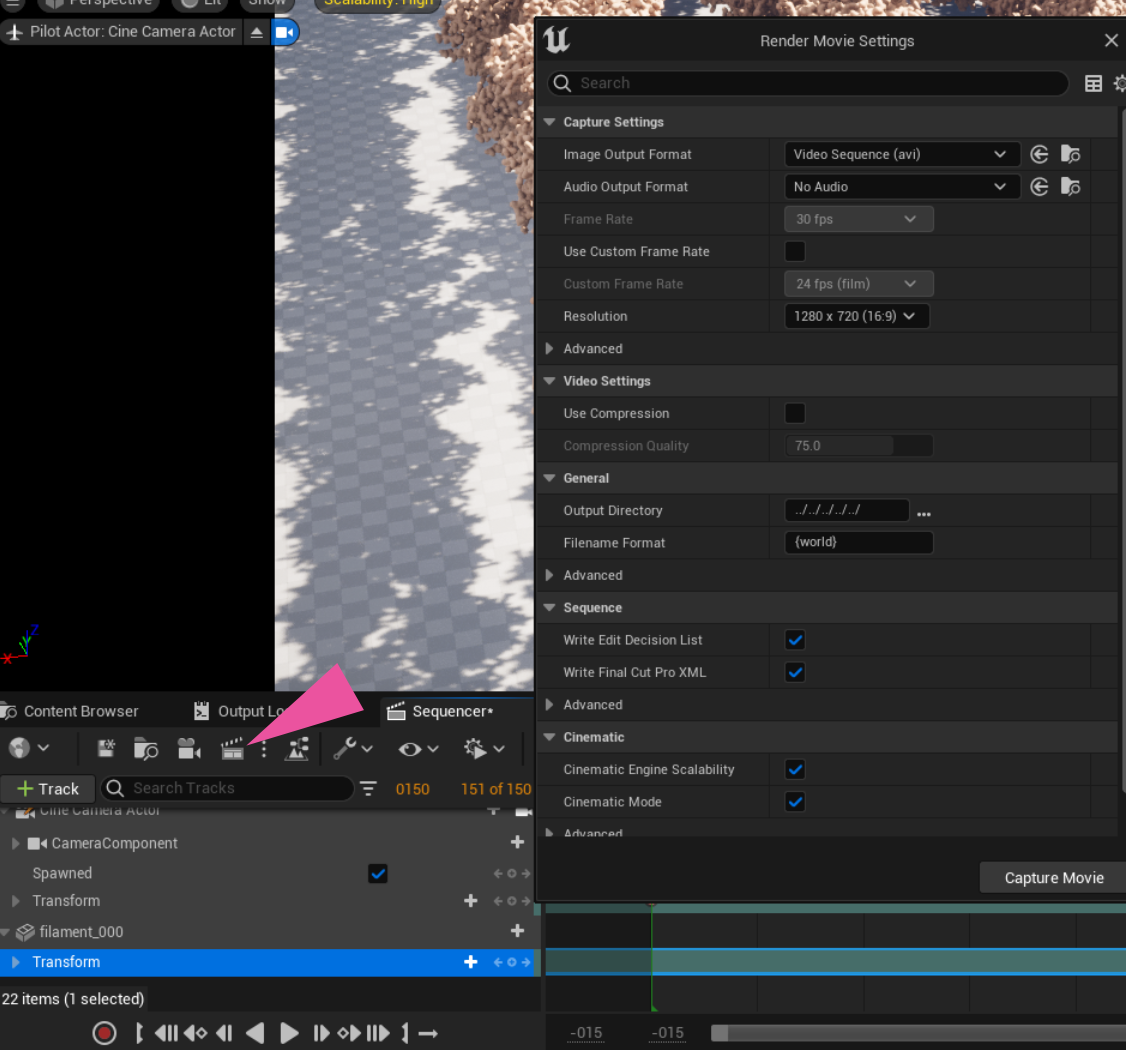
After satisfied with the movie sequence, generate the final movie and save to a file.
Final movie
Here is my final movie for this tutorial. The quality is compromised since the wiki only supports gif...

